Introduction to DIY Drinking Board Games
DIY alcoholic drinking board games combine creativity and fun. They offer a unique twist to the traditional alcohol-fueled gatherings. Making your own board game provides endless customization. Use themes, rules, and tasks of your choice. This project is great for parties, celebrations, or just a creative night in with friends.
Creating a DIY board game can be simple and rewarding. You’ll need some basic supplies and a bit of imagination. The goal is to craft an entertaining and engaging experience. It should encourage interaction and, of course, safe drinking practices. Remember, the point is to have fun and maybe get a little competitive.
Think of your favorite board games for inspiration. What makes them enjoyable? Use these elements as a foundation. Add the alcoholic twist in a playful and responsible way. With a DIY approach, you tailor the game to your group’s preferences. Incorporate inside jokes, personal anecdotes, and favorite beverages.
Throughout this blog, we will delve into the steps to create your own alcoholic drinking board game. We’ll cover everything from essential supplies to rule-making. Plus, we’ll explore customization options and safety tips. Ready your DIY spirit, and let’s start crafting an unforgettable game night!
Essential Supplies for Your Homemade Game
To kick off your DIY alcoholic drinking board game, gather some essential supplies. Start with a sturdy board. Consider a foldable option for easy storage. Next, pick up markers or pens in various colors for drawing. These will help differentiate paths and tasks.
You’ll need a die or spinner to decide player moves. If you’re feeling crafty, create a custom spinner with fun prompts. Collect small objects or tokens to use as game pieces. Each one can represent a player.
For the tasks, you’ll need shot glasses or cups. Choose different colors or designs to add a fun twist. Don’t forget the alcohol of your choice. Include various types for diverse game play. Always remember mixers and non-alcoholic options for moderation.
A notepad is handy for rule jotting and scorekeeping. Grab a timer if you want to add timed challenges. Stickers or stamps can indicate completed tasks with flair.
Lastly, ensure you have a clear plastic cover. It protects your game from spills and can be a surface to write on with dry-erase markers. With all your supplies ready, you’re set to design the ultimate DIY alcoholic drinking board game. Get ready to craft, customize, and play!
Designing the Game Layout
Designing your game layout is a key step in the DIY process. It defines the journey players will take. Begin with paper or cardboard for your board’s base. Choose a size that suits your group’s needs. A larger board can accommodate more tasks and longer play. Consider the number of players when planning the size.
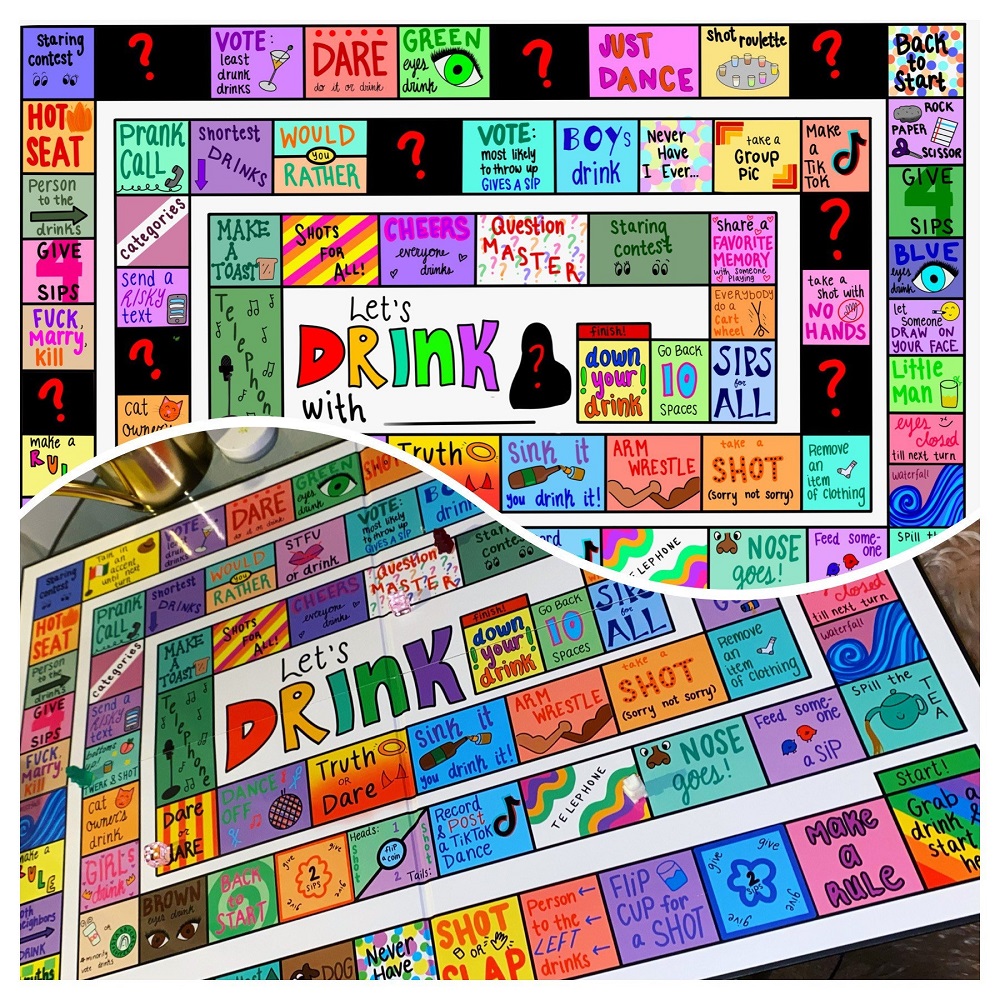
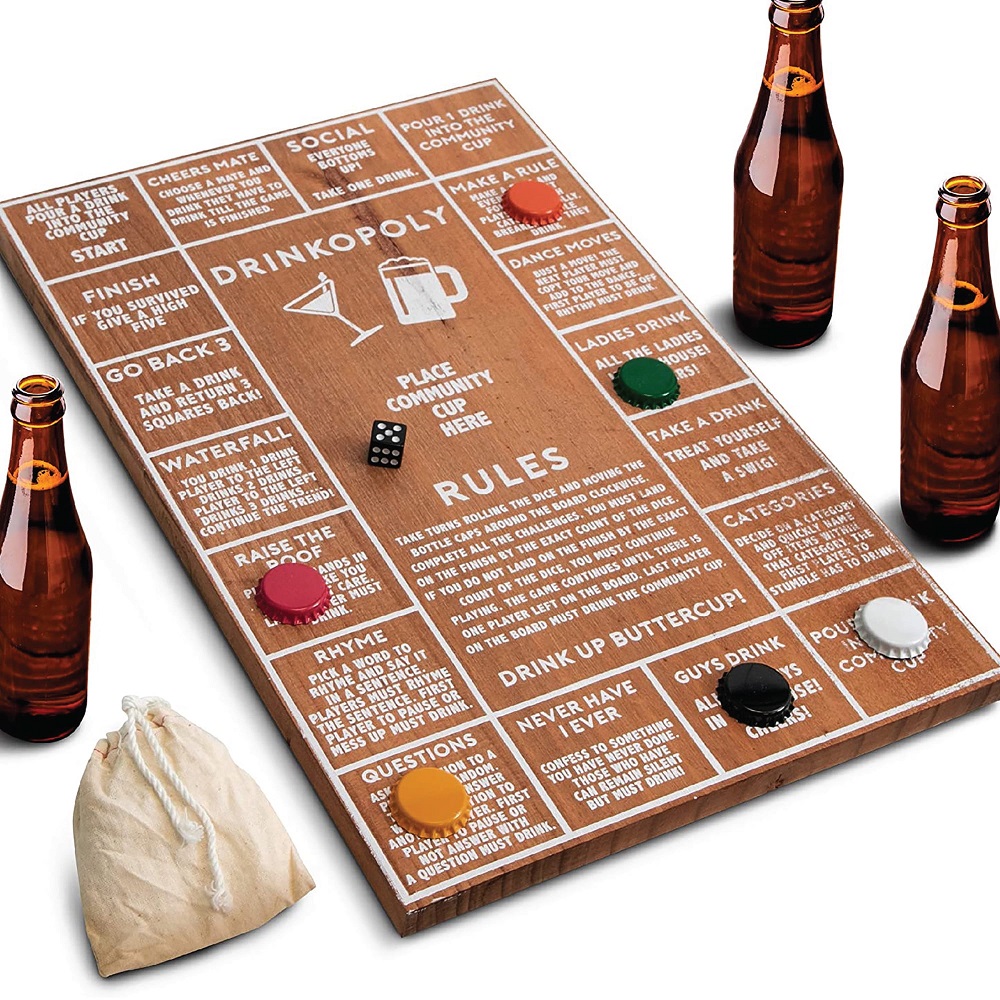
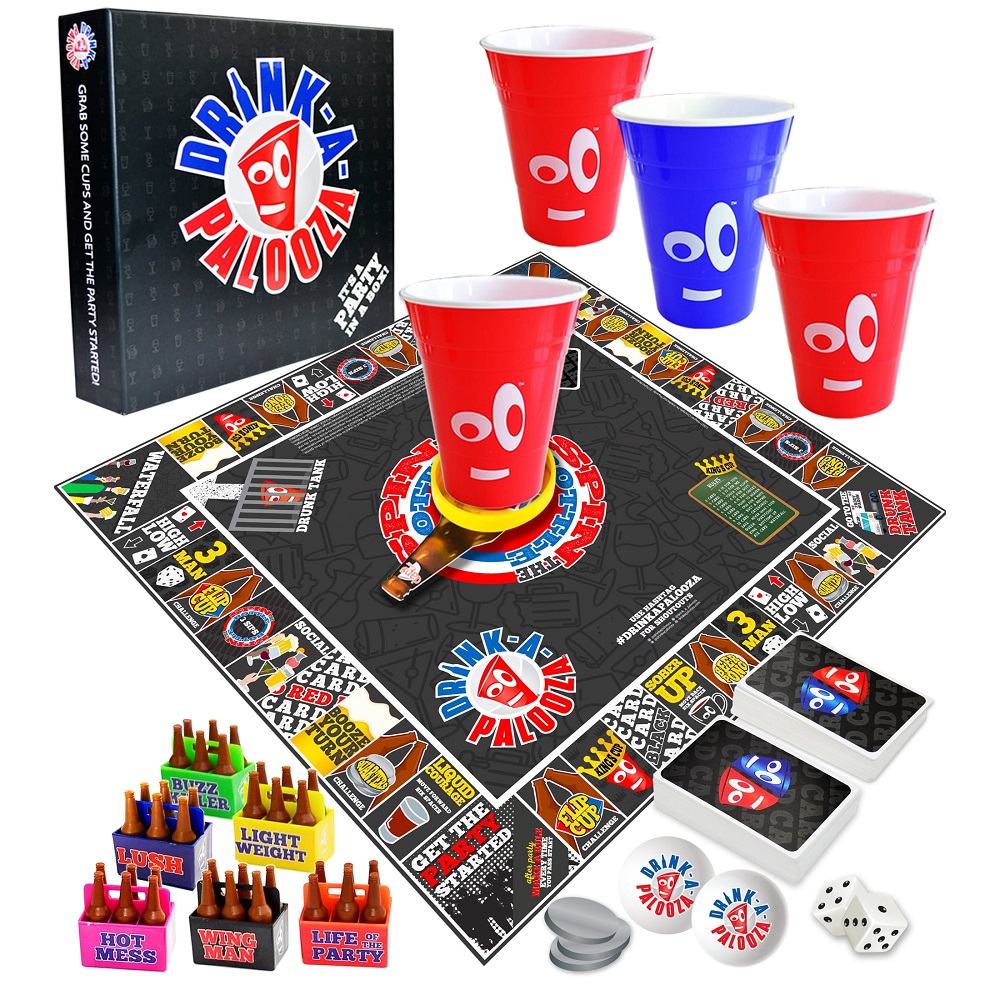
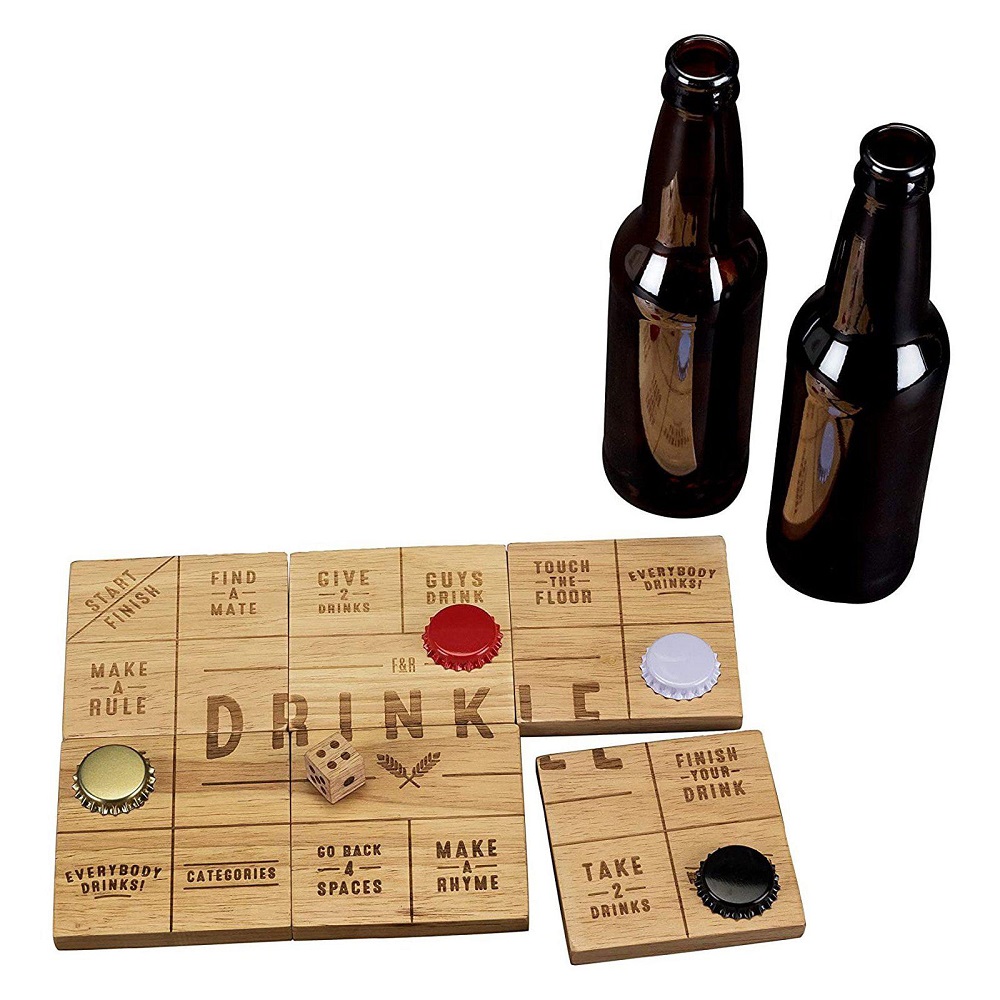
Sketch out a path that winds from start to finish. Use loops, forks, and shortcuts to keep it interesting. For an alcoholic drinking board game DIY, think about where to place drinking challenges. They can be at regular intervals or triggered by special squares. Make sure the path is clear and easy to follow.
Use colored markers to highlight different zones or areas. This adds visual interest and can signify different challenges or rules. Themes come into play here. You could design the layout to reflect a favorite city, movie, or historical period. Apply your chosen theme with creativity across the board.
The start and finish should be marked distinctly. Consider adding a ‘refueling’ station where players can take a break and hydrate. This encourages responsible drinking during the game.
Once you’re happy with the layout, transfer it to your sturdy board. Use permanent markers or paint for a more polished look. A good layout keeps players engaged from start to end. Keep refining until you feel confident it will do just that.
Incorporate spaces for ‘take a shot’ or ‘sip and tell’ tasks within the framework. Players should anticipate the next challenge with both excitement and caution. The layout should encourage fun, but not at the cost of safety.
Creating Rules and Challenges
Creating rules and challenges is the heart of your alcoholic drinking board game DIY. This part shapes how players interact during the game. Here are steps to make the rules clear and challenges fun:
- Define the Basics: Start with basic game rules. For example, how players take turns, move pieces, and what each space means.
- Drinking Rules: Set rules for drinking challenges. Decide when a player must take a drink and how much. Keep safety in mind.
- Penalties and Rewards: Introduce penalties for landing on certain spaces. Also, think of rewards for completing challenges.
- Include Variety: Mix different types of challenges. Some could involve trivia, physical tasks, or social activities.
- Clarity is Key: Write the rules in simple terms. Place them on the board or a separate card for reference.
- Feedback Loop: Playtest your game with friends. Get their input to tweak the rules for better play.
By following these steps, you ensure that your DIY alcoholic drinking board game is enjoyable and dynamic. Rules and challenges should spark laughter and competition without promoting overconsumption. Keep the balance and your game will be a hit at any party.
Ideas for Fun Drinking Tasks
When planning your alcoholic drinking board game DIY, it’s important to come up with engaging and entertaining drinking tasks. These tasks should be fun, encourage laughter, and provide a memorable twist to your game night. Here are some creative task ideas you can incorporate into your game:
- Truth or Drink: Players choose between answering a personal question or taking a drink.
- Rhyme Time: Say a word, and the next player must rhyme with it or take a sip.
- Mini Trivia: Test your knowledge. Get it wrong? Take a shot.
- Flip the Script: Create a scenario. The next player must continue the tale or drink.
- Silly Shenanigans: Dare players to do funny acts or face a drinking consequence.
- Dizzy Duel: Spin around before doing a task. If not done well, drink!
- Secret Sip: Take a drink in secret, and others guess the drinker. Wrong guess means they drink.
- Mimic Master: Imitate a celebrity. Fail to impress? You know the drill—drink!
Remember to tailor the tasks to your group’s comfort level. Keep the vibe upbeat and never pressure anyone to drink more than they’re comfortable with. The aim is purely for entertainment, fostering a sense of camaraderie, and creating an atmosphere full of laughter. When planning these tasks, always have alternative options for those who prefer non-alcoholic drinks or water. This way, everyone gets to participate and enjoy the game to the fullest.
Customization and Theming Your Game
Customizing your alcoholic drinking board game DIY makes it unique. Here’s how to infuse personality and theme:
- Choose a Theme: Select a theme that resonates with your group. It could mirror a favorite show, era, or hobby.
- Design Elements: Incorporate theme-related designs on the board. Use symbols, images, and colors that match your theme.
- Custom Tokens: Personalize game pieces to reflect each player or the theme. Think mini figures or themed objects.
- Specialized Tasks: Craft tasks that align with the theme. They should fit naturally and add to the immersion.
- Theme Music: Create a playlist of tunes to match your game’s vibe. This enhances the atmosphere.
- Dress Code: Encourage players to dress according to the theme. It adds a fun layer.
- Themed Drinks: Pick drinks that go with your theme. Offer themed cocktails or mocktails for a twist.
- Invites and Marketing: If it’s a big event, make themed invites. Build excitement with a creative touch.
Every game is more memorable with the right theming. It helps set the tone and makes the night stand out. Keep themes light and fun to ensure everyone enjoys without feeling out of place. Prepare to host a game night that’s talked about for ages!
Safety Measures and Responsible Drinking Tips
Creating an alcoholic drinking board game DIY is all about good fun. However, safety is paramount. Here are some tips to ensure that everyone enjoys the game responsibly:
- Stay Hydrated: Encourage players to drink water between alcoholic drinks to stay hydrated.
- Sensible Limits: Set a cap on the number of drinks per person to prevent overindulgence.
- Non-Alcoholic Options: Offer non-alcoholic drinks for those who wish to limit their alcohol intake.
- Food Is Your Friend: Serve snacks and food to help absorb the alcohol and keep energy levels up.
- Know When to Stop: If someone shows signs of intoxication, pause the game and assist them.
- Safe Rides Home: Ensure everyone has a designated driver or a safe way to get home.
- Respect Choices: Never pressure anyone to drink more than they are comfortable with.
- Rule Clarity: Clearly explain the game’s safety rules before starting to play.
By keeping these points in mind, you not only create an enjoyable environment but also a responsible one. Crafting the perfect night means keeping laughter in the air and safety in mind. Remember, the goal is to make memorable moments, not risky mistakes. Let the good times roll, responsibly!
Final Thoughts: Bringing Your Game to Life
Bringing your DIY alcoholic drinking board game to life is the final, exciting step. Here’s a simple guide to make it happen:
- Review Everything: Check all your game components. Make sure you have your board, pieces, and rules ready.
- Set Up Your Space: Choose a comfortable spot for your game night. Clear a table and arrange seating for everyone.
- Lay It All Out: Place your game board, tokens, dice or spinner, and drinking cups on the table.
- Prep the Drinks: Have your alcoholic and non-alcoholic beverages ready. Arrange them neatly for easy access.
- Share the Rules: Go over the game rules with your guests. Make sure they understand how to play.
- Start with a Toast: Kick things off with a cheerful toast. Choose a fun, inclusive phrase to get everyone excited.
- Play with Spirit: Dive into the game with enthusiasm. Keep the pace lively and the atmosphere charged.
- Be Present: Engage with your friends. Laugh, cheer, and enjoy the unique game you’ve created.
After the night is over, gather feedback from your friends. Find out what they loved and what could be better. Use their thoughts to refine your game for next time. Each playtest helps you tweak and improve your creation.
Remember the heart of DIY is personal touch and shared joy. Your game will evolve with each gathering. It will become a memorable part of your social traditions. Enjoy the process and the many game nights to come!