Learning how to release a bowling ball correctly is one of the most important skills in the sport. Without a proper release, even the strongest throw can miss its mark. The release affects hook potential, accuracy, and pin carry. That’s why beginners and experienced players alike must focus on this critical step. A smooth, consistent release leads to better control and higher scores over time.
Moreover, mastering how to release a bowling ball involves more than just letting go. It combines grip, stance, swing timing, finger positioning, and follow-through. Each element plays a role in creating an effective delivery. Whether you’re using a house ball or a custom-drilled one, technique matters most. With practice and attention to detail, anyone can improve their form. In short, understanding how to release a bowling ball transforms casual play into serious performance.
 Understanding the Correct Grip for Better Control
Choose Between Fingertip, Full-Hand, and Custom Grips
The first step in learning how to release a bowling ball starts with your grip. Most modern bowlers use the fingertip grip. This means only the tips of the middle and ring fingers go deep into the holes. The thumb inserts fully. This style allows more lift and rotation during release. As a result, it creates stronger hook potential.
On the other hand, the full-hand (or conventional) grip places all three digits deeper into the ball. This reduces spin but increases stability. It works well for beginners who want straighter shots. However, it limits advanced techniques like controlled hooks.
Custom-fitted balls offer the best fit. Pro shops drill holes based on hand size and finger spacing. This ensures comfort and consistency. Always avoid borrowing balls with ill-fitting holes. They reduce control and increase injury risk.
Your grip should feel secure but not tight. Clenching too hard restricts wrist movement. Instead, hold the ball lightly—like holding a tube of toothpaste without squeezing. This allows natural motion during the swing. Hence, choosing the right grip sets the foundation for a clean release.
Building a Solid Stance Before the Release
Align Your Body for Balance and Accuracy
Before focusing on how to release a bowling ball, you need a stable starting position. Stand behind the foul line with feet shoulder-width apart. Point your non-dominant foot slightly forward. This helps guide your body down the lane.
Keep your knees slightly bent. This lowers your center of gravity. It also prepares your legs for the approach. Hold the ball at waist level with both hands. Let your dominant arm support most of the weight.
Position your shoulders square to the target. Avoid twisting early. Keep your head up and eyes on the arrows or dots near the foul line. These are aiming guides built into the lane.
Shift your weight slightly onto your back foot. This stores energy for the first step. Remain still for a brief moment. This pause improves rhythm and focus.
A balanced stance prevents wobbling during motion. If your base is weak, your entire delivery suffers. Therefore, building a strong foundation makes how to release a bowling ball much easier and more repeatable.
 Perfecting the Swing Motion for a Smooth Delivery
Use Gravity and Timing to Maximize Power
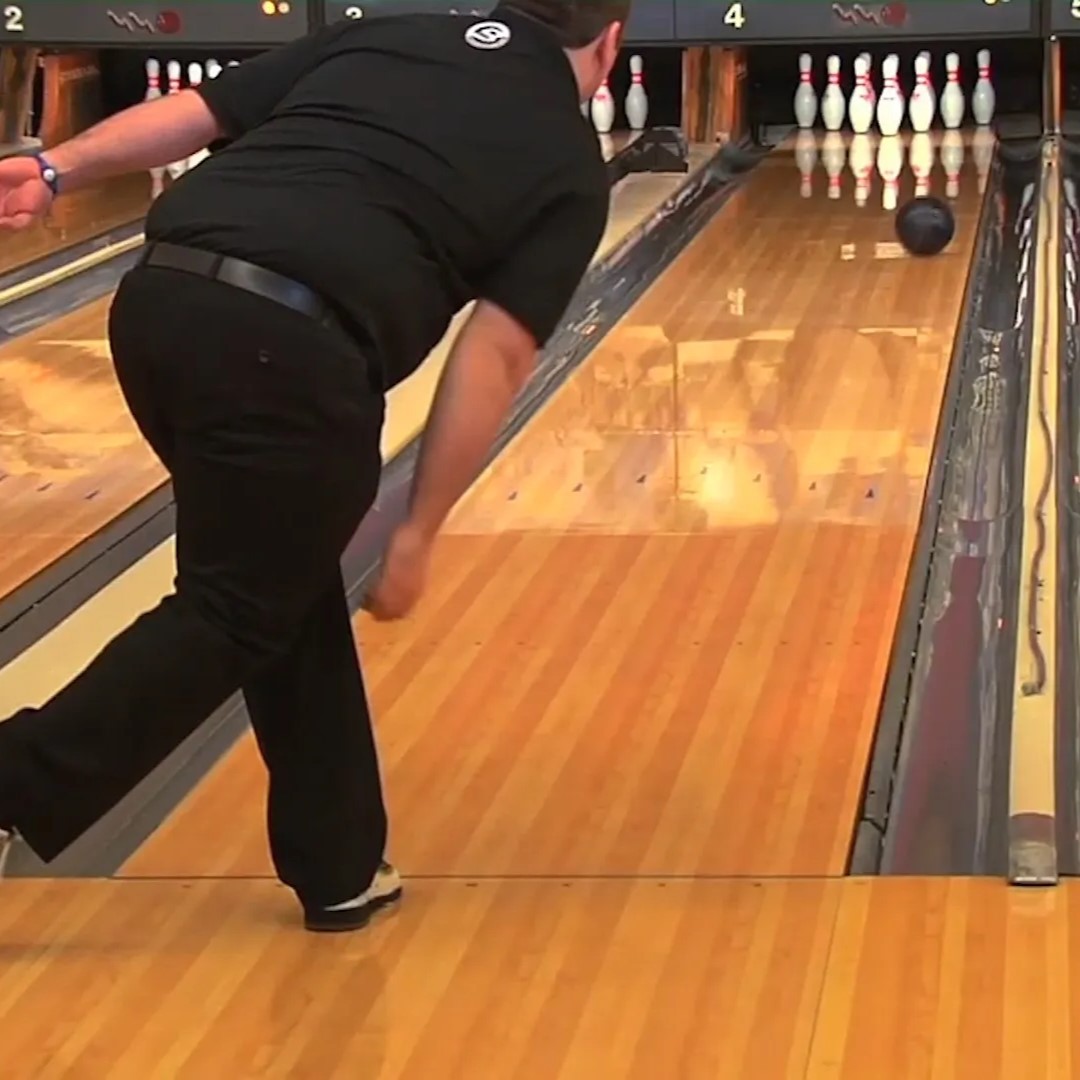
Once your stance is set, the next phase in how to release a bowling ball is the swing. Start by moving your arm straight back. Keep it close to your body. Do not let it drift outward. This keeps the path consistent.
Let gravity pull the ball down naturally. Avoid pushing or forcing the swing. This causes jerky movements and poor timing. Instead, allow the ball to drop into the pendulum motion.
Coordinate your steps with the swing. Most players use a four-step or five-step approach. Step one begins as the ball moves back. Step two matches mid-swing and step three aligns with the forward push and Step four lands just before release.
Your arm should stay relaxed throughout. Tension slows down the swing. It also reduces fluidity. Think of your arm like a rope swinging a bucket—smooth and continuous.
At the bottom of the swing, your hand should be directly behind the ball. This ensures maximum power transfer. Any deviation weakens impact and accuracy. Thus, mastering the swing leads to cleaner releases.
Mastering Finger Position and Wrist Alignment
Set Up for Rotation Without Injury
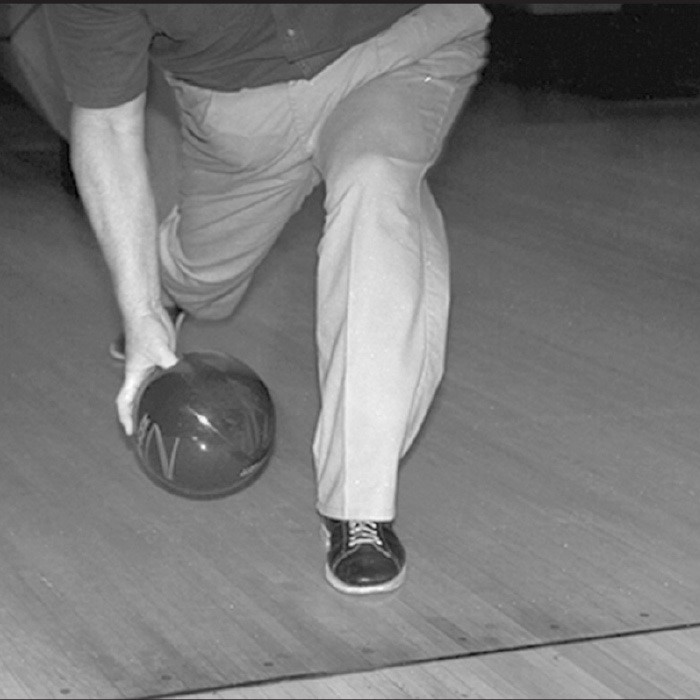
One of the most crucial parts of how to release a bowling ball is finger and wrist control. Your fingers should rest comfortably in the drilled holes. The middle and ring fingers go deep. The thumb exits cleanly at release.
As the ball swings forward, keep your wrist firm. Do not collapse it inward or outward. A cupped or broken wrist creates unpredictable spins. Worse, it may lead to strain or long-term injury.
Rotate your hand slightly clockwise (for right-handers) during release. This imparts side rotation. It helps the ball hook toward the pocket. Left-handers rotate counterclockwise. Practice this motion slowly at first. Speed comes later.
Some bowlers use wrist supports or gloves. These stabilize the joint during aggressive throws. They’re especially helpful if you bowl frequently. However, don’t rely on them too much. Build natural strength over time.
Avoid “tugging” the ball with your fingers. This disrupts balance. It also reduces accuracy. Let the rotation happen naturally through motion—not force. Therefore, proper alignment enhances both safety and performance.
 Executing the Follow-Through for Maximum Effect
Extend Your Arm and Maintain Form After Release
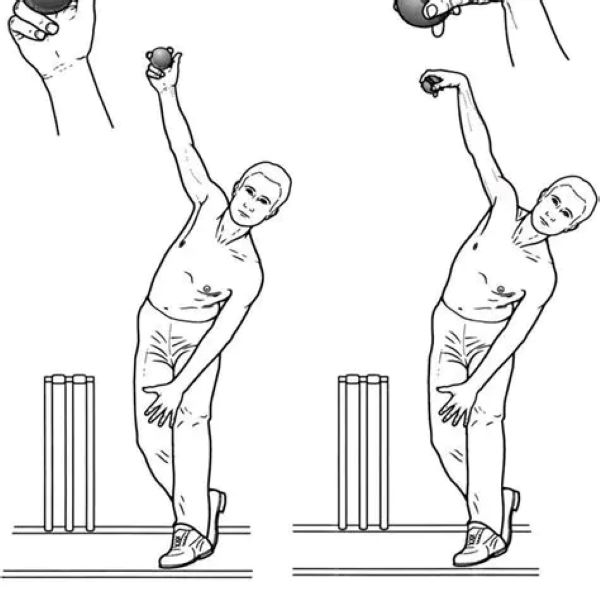
The release doesn’t end when the ball leaves your hand. The follow-through completes the process. After letting go, continue moving your arm upward. Point it toward your target. This ensures directional consistency.
Your hand should finish high, near your forehead or ear. The palm faces the lane or slightly inward. This indicates proper rotation and timing. A low or sideways finish often means poor mechanics.
Keep your body balanced after release. Do not lean forward or fall to one side. Stay on your front leg. This proves you maintained control throughout the shot.
Hold the final pose for a second. This “freeze frame” helps you evaluate your form. Coaches often use this moment to spot errors. You can do the same by recording your throws.
A strong follow-through reinforces muscle memory. It trains your body to repeat successful motions. Over time, this builds confidence and scoring power. Hence, never skip this final step when practicing how to release a bowling ball.
Common Mistakes and How to Fix Them Quickly
Identify Errors in Grip, Timing, and Release
Even experienced players make mistakes when learning how to release a bowling ball. One common issue is dropping the ball too early. This happens when the swing lags behind the steps. To fix it, slow down your approach. Sync your timing so the ball reaches the bottom just as your last step lands.
Another problem is excessive wrist movement. Some bowlers flip their wrists aggressively. This creates wild hooks or gutter balls. Instead, focus on keeping the wrist stable. Use drills that isolate hand position.
Holding the ball too tightly is another error. This tenses the arm and ruins fluidity. Try relaxing your grip until the ball almost feels loose. Trust that momentum—not grip strength—powers the throw.
Some players release off to the side. This pulls the ball away from the target. Check your stance and shoulder alignment. Make sure they face the pins, not angled outward.
Lastly, rushing the shot breaks rhythm. Take a breath between throws. Reset your focus. A calm mind leads to better execution. By identifying these issues early, you speed up improvement.
 Frequently Asked Questions About How to Release a Bowling Ball
Can I Hook the Ball Without a Drilled Ball?
Yes, but it’s harder. House balls have standard holes. They rarely fit well. Still, you can create slight rotation using wrist motion. For serious hooking, invest in a fitted ball.
Should Beginners Focus on Straight or Hook Shots?
Start with straight shots. Learn balance, timing, and aim first. Add hooks once your fundamentals are solid. This prevents bad habits.
How Do I Know If My Release Is Consistent?
Record your throws. Watch for the same hand position, swing path, and follow-through each time. Small variations cause big misses.
Is It Okay to Use a Towel Under the Armpit?
Some coaches recommend it. It stops the arm from flaring out. However, use it only during drills. Don’t depend on it during real games.
Can Kids Learn How to Release a Bowling Ball Properly?
Absolutely. Teach them early with lightweight balls. Focus on fun and form. Use bumpers at first. Gradually remove them as skill improves.
 Final Thoughts on Improving Your Bowling Technique
Make Practice Purposeful and Track Your Progress
Mastering how to release a bowling ball takes time, patience, and repetition. No single session will perfect your form. However, consistent, mindful practice leads to real improvement. Break down each step. Work on one element at a time.
Use video recordings to analyze your motion. Compare yourself to professional bowlers. Notice how smooth and rhythmic their releases are. Emulate those qualities.
Join a league or take lessons. Feedback from others speeds up growth. You’ll catch errors you didn’t notice. Plus, competition sharpens focus.
Celebrate small wins. Maybe today your follow-through was cleaner. Or your thumb came out smoothly. These details matter.
Ultimately, how to release a bowling ball is about control, timing, and confidence. When executed well, it turns average throws into strikes. Keep refining your technique. The results will show on the scoreboard.